Felt Mitten Garland
Top Dog Dies
Winter


Felt Mitten Garland
Happy Friday!
I had my stack of felt out this week while working on
some other projects; the thought came to me that a garland
of die-cut mittens would look so cute hung across a window or even
tied onto a large gift package:
For the mittens, I used the potholder die from the Apron Card Finisher Set.
The dies also create a little hash pattern across the mitten, which really gives
all of the detail that's needed. I took a length of baker's twine and glued the
mittens onto the strand with fabric glue.
Here is a (not-so-good, rainy day) photo of it hanging up in my craft room along
with some other handmade garlands :) A strand this long took roughly 30 minutes to make.
Visit Top Dog Dies to see all of their exclusive dies + dies by other leading manufacturers!
Altered Art
bella blvd
Christmas Countdown
Christmas Ornaments
decor
paper mache
Snowman

Hello! It's a "Monday Morning Challenge" on Thursday with
BELLA BLVD
www.bellablvd.typepad.com
This week a few of the Design Team were asked to craft holiday decor
and being that I love snowmen, I decided one a paper mache ornament!
 You can try any size or shape of plain paper mache ornament for a Snowy Man such as this.
 For mine, I chose a 6" paper mache egg. First, I cut 10-12 1" wide strips
(use a smaller width for smaller shapes) from a sheet of patterned paper;
trim strips down to fit from top to bottom of the ornament.
 Using Mod Podge and a sponge brush, apply a thin coat to a small section of the
ornament and then press paper strips into place. Once all of the strips have been adhered,
apply a thin coat of Mod Podge over the entire piece. Once that has dried, cover with iridescent glitter.
Embellish with a paper cone hat, crochet heart cheeks and wooden eyes and nose.
 To create the cone hat, cut a piece of patterned paper to 5.25" X 11"; trim into a semi-circle
(as shown in photo) and then roll into shape.

 Bella Blvd Products: Christmas Countdown: Tree Park, Paper Pieces, Captions;
Freestyle Sophisticates: Freestyle Saltwater; Crochet Hearts: Cotton Candy
I'll be back tomorrow with a similar fellow ;)
Snowy Man

Hello! It's a "Monday Morning Challenge" on Thursday with
BELLA BLVD
www.bellablvd.typepad.com
This week a few of the Design Team were asked to craft holiday decor
and being that I love snowmen, I decided one a paper mache ornament!

(use a smaller width for smaller shapes) from a sheet of patterned paper;
trim strips down to fit from top to bottom of the ornament.

ornament and then press paper strips into place. Once all of the strips have been adhered,
apply a thin coat of Mod Podge over the entire piece. Once that has dried, cover with iridescent glitter.
Embellish with a paper cone hat, crochet heart cheeks and wooden eyes and nose.

(as shown in photo) and then roll into shape.


Freestyle Sophisticates: Freestyle Saltwater; Crochet Hearts: Cotton Candy
I'll be back tomorrow with a similar fellow ;)
Holiday Blog Hop

Welcome to the very first
TOP DOG DIES
HOLIDAY BLOG HOP
HOLIDAY BLOG HOP
Hop on through each Design Team Member’s blog to see their fab creations:
Michelle Neddo
Angela Bode
Kendra Sand
Kathy Martin
Vicki Dutcher
Lisa Somerville
Nasayi Atkins
Maureen Cronin
Shellye McDaniel
Angela Bode
Kendra Sand
Kathy Martin
Vicki Dutcher
Lisa Somerville
Nasayi Atkins
Maureen Cronin
Shellye McDaniel
**The party isn’t over just yet, though**
We’re giving away $50 Top Dog Dies eGift Cards to two lucky winners.
Entering is easy: Just add your email address here and you’ll be included in the giveaway!

I loved pairing the classic, vintage look of the Joyous Collection by Authentique Paper
with the Sophie Mat Die Set by Top Dog Dies. When you have a beautiful set of dies such as
these, not much else is needed in the embellishment department when creating a card!

I also die-cut the scalloped border at the bottom using the Apron Card Finishers Dies.
Also included in the same set is an oven mitt...I thought it would make a cute pair of winter mittens!
You can earn extra entries by commenting along the blog hop and by following
You have until Friday Dec. 13 to enter and we'll announce the winners on Monday Dec. 16.
Thanks for joining us for our first – but definitely not our last – blog hop. Happy hopping!
Blog Hop
PaperHaus Magazine
tutorial
Winter
WOW Embossing


Paper Haus Winter Frolic

Welcome to the Winter Frolic 12 Days Of Christmas Blog Hop
We are celebrating the release of the Winter Issue of PaperHaus Magazine and also
inspiring each day with wonderful holiday projects, giveaways and inspiration!
**Our blog hop will run from December 1st to December 12th**
Be sure to stop and leave a comment each day to win some fabulous prizes by our lovely sponsors!
**You should be arriving here from Eila Sandberg's Blog**
Here is the blog list for today's hop:
- PaperHaus Magazine www.thepaperhaus.com
- Bente Fagerberg www.paperandglueheaven.blogspo
t.com - Eila Sandberg www.dollopsofscrap.blogspot.co
m - Shellye McDaniel www.shellyemcdaniel.com
- Authentique www.blog.authentiquepaper.com
My project for today was inspired by a new set of snowflake molds
by WOW! Embossing. After watching a couple of tutorials, I decided that adding
push-pins to the backs of the resin would make a cute gift to put in my daughter's stocking!
She has quite a collection of cute push-pins for her corkboard and she will love these :)
As you can see, I also made up pins using layered buttons and die-cut corrugated snowflakes.
I assembled my supplies from WOW!: Melt-It Powder; Pastel Blue Embossing Powder; Mold
This is such a cool concept...and if you've never experienced WOW! products, be sure
to check out their website and see if it's for you!
Before getting ready to melt your powder, you will also need:
Pie tin, spoon, heat gun and a clothes pin or oven mitt
The ratio that I used for my Blue Snowflakes was 4:1 (melting powder to embossing powder)
1- Mix the two together in your tin
(create a 'spout' at one side so that you can pour the melted resin into the molds)
2- Place heat gun under the tin and heat for approximately 2 minutes or until the powder has
been melted; be sure to hold the tin with a clothes pin or pot holder...it gets pretty warm!
3- Pour melted resin into each mold.
4- Press push-pins into the mold and allow to set.
5- Gently peel the mold away from the resin and you're done!
Again, there are some great tutorials on their YouTube Channel
I created a little banner to go along with my pins:
Banner die by Sizzix and sticker letters by Doodlebug Design.
As you can see, I've used the Blue Snowflake pins to hold up the banner :)
For the black button/snowflake pins, I simply used an epoxy glue when adding the push pin
to the back. I found the corkboard (all ready in the pretty frame!) at Kirkland's.
I also added some faux burlap bows (by May Arts Ribbon) to the top sides of the frame...
I love how it ties in with the natural look of the corkboard!
That's all that I have to share today...thanks so much for stopping by and participating
in the PaperHaus Blog Hop... your next stop is the AUTHENTIQUE PAPER BLOG
Doodlebug Design Team

Aimee Kidd North Carolina
Doodling in 2014

I'm very happy to be back for another year with
DOODLEBUG DESIGN
Congratulations to all of those who'll be along for this fun journey!
Doodlebug Design is such an amazing company and I'm honored to represent them once again.
Aimee Kidd North Carolina
Amanda Coleman Idaho
Courtney Lee California
Kathy Skou MA
Jodi Wilton Canada
Shellye McDaniel Texas
Tya Smith Utah
Wendy Sue Anderson Utah
And a fond farewell to the 2013 Doodlebug Design Team...you've been an inspiration to me over this past year and I look forward to seeing you all enjoy new endeavors!
3L Scrapbook Adhesives
Blog Hop
card
Carta Bella
May Arts Ribbon
Winter


May Arts + Scrapbook Adhesives
Welcome to Day #1 of the
Scrapbook Adhesives & May Arts Ribbon Blog Hop
This will be a week long event with only a few stops each day.
Be sure to stop by the May Arts Blog to begin
GIVEAWAY-GIVEAWAY-GIVEAWAY
**Two spools of ribbon and adhesives will be given away to a lucky commentor**
I haven't had the chance to use this sweet winter collection by Carta Bella,
so I thought making a card for the hop would be the perfect opportunity.
And if you've followed my blog for any length of time, you know how much
I all ready love and adore Scrapbook Adhesives!
I use their foam square adhesives like they're going out of style tomorrow :)

I cut the hexagon paper out around the design and then adhered it to the
snowflake paper with foam square adhesive.
After applying a length of the border sticker (again, with foam adhesive), I took a strip of
Crafty Power Tape and attached it just above the border. With its super high tack, this
tape is made for holding items, such as ribbon, in place.
I looped the checkered ribbon by tucking and folding in a haphazard-fashion...just go with
the flow...whatever you think looks pretty :) Just press onto the tape and you'll have
no worries about it coming up from its position.

I took a small piece of the Crafty Power Tape, doubled it and then used it to attach
each of the buttons in place. Done!
**YOUR NEXT STOP...Latrice Murphy's Blog**
Enjoy and thank you for being a part of this fun hop!
scrapbook and cards today
Winter Issue

Winter Cards at Scrapbook & Cards Today
I have to say again, it was such a thrill to have been asked to design
five cards for the Winter Issue of
SCRAPBOOK & CARDS TODAY MAGAZINE
And isn't the cover the cutest with the chalkboard art and bright layout?!?

You can now download your FREE digital copy of the magazine
You can also view the cards that I created right here:
Paper copies of the magazine and their 2014 Planner are also available for ordering :)
Back to tomorrow with a blog hop!
Cards
Day to Day Collection
Doodlebug Design
Gift Box

Give Handmade
Love making cards? Give a set as a gift this Christmas!
I have a simple way to give your handmade cards,
as well as keep them organized and safe from damage.
I'm using Doodlebug Designs' "Day to Day" Collection
www.doodlebugblog.com
I'm using Doodlebug Designs' "Day to Day" Collection
www.doodlebugblog.com

First, I created a sturdy storage box with a sheet of 6x12 mat board
(found at most craft/framing stores). I scored the length at the 5" and 7" marks,
which gave finished dimensions of 6"W x 5"H x 2"D.
Just fold in on the score marks as you begin applying the desired patterned paper
(I've used Day By Day Collection for this project). By keeping the mat board folded
as you apply the paper, you will not have a gap or bubble once the box is together.
Cut your patterned paper to 10" x 12" and score at the 5" and 7" marks lengthwise.
Turn and score at 2" and 8" marks. Fold in and proceed to adhere to the mat board as
suggested above; make sure to center the paper and line-up score marks with score marks.
For the sides, cut out the small section between the two flaps and then glue the flaps together.


(found at most craft/framing stores). I scored the length at the 5" and 7" marks,
which gave finished dimensions of 6"W x 5"H x 2"D.
Just fold in on the score marks as you begin applying the desired patterned paper
(I've used Day By Day Collection for this project). By keeping the mat board folded
as you apply the paper, you will not have a gap or bubble once the box is together.
Cut your patterned paper to 10" x 12" and score at the 5" and 7" marks lengthwise.
Turn and score at 2" and 8" marks. Fold in and proceed to adhere to the mat board as
suggested above; make sure to center the paper and line-up score marks with score marks.
For the sides, cut out the small section between the two flaps and then glue the flaps together.

Decorate the front as desired and then begin assembling some simple note cards using
Doodlebug's premade Create-A-Cards!

My mom requested a set of everyday cards that she can send to friends and family, so I
kept the sentiments short and sweet OR I left the inside blank and only decorated the front.

A storage box of this size easily holds 10 decorated A6 cards.
You may choose to slip the box into a cellophane bag and tie on a bow before giving.
Anyone who loves handmade cards will surely appreciate such a gift :)
You will find all sorts of Gift-Giving Inspiration on the Doodlebug Blog this month
as we countdown to Christmas!
Enjoy your Saturday, friends!
card
Chalkboard Collection
Top Dog Dies
We R Memory Keepers

A Happy Heart
Welcome to this week's project for
TOP DOG DIES
Oh I had fun making this card! I love layering with a large shape
followed by different strips of paper that have been staggered in dimension.

All of the papers are from We R's Chalkboard Collection.
After die-cutting the scalloped heart shape (Heart Mini Album Finishers Die Set),
I sanded lightly around the edges before adding it to the base paper with foam adhesive.
 Next, I die cut the lacy Wesley Border from one of the cardstocks in the collection
and then backed it (partially) with a strip of contrasting paper. I added mini pearls to every-other
small opening at the top of the border. A sentiment cut from one of the border strips was
layered on top, along with a small sticker.
Visit Top Dog Dies today and find out how you can earn Rewards Points when you shop!
www.topdogdies.com
I always appreciate your visits!
After die-cutting the scalloped heart shape (Heart Mini Album Finishers Die Set),
I sanded lightly around the edges before adding it to the base paper with foam adhesive.

and then backed it (partially) with a strip of contrasting paper. I added mini pearls to every-other
small opening at the top of the border. A sentiment cut from one of the border strips was
layered on top, along with a small sticker.
Visit Top Dog Dies today and find out how you can earn Rewards Points when you shop!
www.topdogdies.com
I always appreciate your visits!
Christmas
felt applique
May Arts Ribbon
sewing

Gingerbread House
I've always loved felt crafts and after seeing quite a few
really cute projects on Pinterest, I was inspired to create a little
felt creation of my own along with some sweet
MAY ARTS RIBBON

I would love it if you came by the May Arts' blog today and take a look!
I have instructions of how I put it together, as well as more photos :)
--SEE IT ALL HERE--
Hope you all have a warm & cozy day!
Blog Hop
Christmas Card
May Arts Ribbon


Christmas Card Blog Hop!

What a fun day! Whether you're looking
for cute and sweet or frilly and sophisticated, we have the ideas covered!
**There is also a GIVEAWAY from May Arts Ribbon**
3 SPOOLS of CHRISTMAS RIBBON
3 SPOOLS of CHRISTMAS RIBBON
Just comment as you visit the blogs today :)
For my card I chose to create a tree made from tiered ribbon bows


From May Arts I've used the Mini Pom Pom Trim and Checked Ribbon.
Paper and birdhouse from Martha Stewart Crafts; buttons by October Afternoon.
Here is a list of the hop:
Christina Colón
Charlene Driggs
Courtney Lee
DeeDee Catron
Emily Lanham
Gini Williams Cagle
Jen Shears
Jenifer Cowles
Karen Baker
Lalo IK
Shellye McDaniel
Virginia Fynes
Latrice Murphy
Charlene Driggs
Courtney Lee
DeeDee Catron
Emily Lanham
Gini Williams Cagle
Jen Shears
Jenifer Cowles
Karen Baker
Lalo IK
Shellye McDaniel
Virginia Fynes
Latrice Murphy
Enjoy this day of Christmas Card inspiration!
christmas gift
May Arts Ribbon

A Gift Wrapped Album
In need of a very inexpensive gift this Christmas?
Today I have just that up on the
MAY ARTS RIBBON BLOG!

It's a $2 photo album that I purchased from Dollar General.
Perfect for a mini December Daily project or a quick teacher's gift!
See how I put it all together by visiting the May Arts' Blog
card
Paper Haus Magazine
Winter Issue
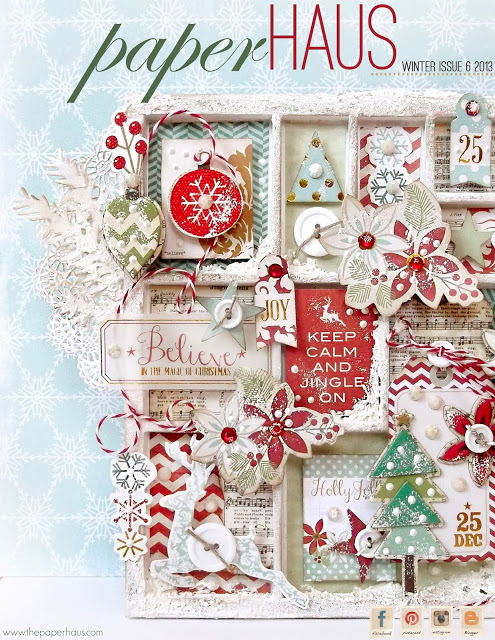
Paper Haus: Winter 2013 Edition
We are proud to announce the Winter Issue of
PAPER HAUS MAGAZINE
It is gorgeous. It is peaceful. It is inspiring.
Click on the magazine cover to begin viewing...I have a card on page 110
that I would for you to take a look at! Enjoy browsing!
And be sure to stop by the Paper Haus Blog for the
"Winter Frolic 12 Days of Christmas" Blog Hop featuring tons of prizes & ideas!
I'll be back on December the 10th to participate in the hopping :)


