Showing posts with label 12x12 Layout. Show all posts
Showing posts with label 12x12 Layout. Show all posts
12x12 Layout
flower girl
giveaway
We R Memory Keepers
WeR

WeR Flower Girl & A Giveaway!
A happy Monday to you!
I'm up today on the WeR Memory Keepers Blog
with a layout using the new "Flower Girl" Collection:
PLUS, WeR is having a GIVEAWAY of this collection!
Visit the blog post --HERE-- to see the full layout AND find out how
you can enter to win the "Flower Girl" Collection!
Comments will be taken until April 22nd...good luck!
12x12 Layout
Alphabet Punch Board
We R Memory Keepers

Putting the "U" in Flower
hey, hey, hey, I'm up toady
on the
with this so sweet layout featuring the
"Honey, I'm Home" Collection and the brand spanking NEW
"Alphabet Punch Board"
(available soon!)

This is justttt a little peek, so stop by the WRMK Blog to
learn how I put it all together :)
Thanks for dropping by!
Thanks for dropping by!
12x12 Layout
Echo Park Paper
Hello Winter Collection
silhouette
Cutest Snowman
Hi y'all! I recently shared a "Hello Winter" Layout at
ECHO PARK PAPER
using a few SVG shapes from the Silhouette Design Store.
www.echoparkpaper.com
www.silhouettedesignstore.com
 To begin, I selected the Dark Teal/Cream paper, Arctic Plaid patterned paper,
Teal/Grey paper and the Label Set SVG File set from Silhouette Design Store.
I cut the largest scallop design from the plaid paper to measure 11” in diameter.
 The scroll label was cut from the teal/grey paper to measure 9.25” square.
The scallop paper was center and glued to the dark teal/cream paper. I used strips
of foam adhesive tape to attach the label paper to the center of the scallop.
 Next, I printed to photos and cut them down to measure 4”W X 3.75”H.
The two were layered side-by-side and overlapped to measure 7.25” wide.
I used the cream side of the solid paper as a mat for the photos and then
attached it to the top/center of the label paper.
 Using three different patterns from the 6X6 Paper Pad and the
Pine Trees SVG File set, I cut out several of the tree shapes. I added the 6X6
squares to the 12” cutting mat and arranged the trio of tree shapes so that they
would be cut from each of the three squares. A sticker strip from the Alpha Sticker Sheet
was attached along the bottom of the photos. The trees were clustered in threes at
each side of the photo and overlapping the sticker strip as needed.
I used foam adhesive to achieve various dimensions for the trees.


Round chipboard snowflakes were used to embellish the tops of a few of the trees. Instead of journaling, I used one of the sticker sentiments. The alpha stickers were the perfect size to go atop the chipboard banners. Instead of spelling out ‘snowman’ I simply allowed the snowman sticker to complete the title!
PRODUCTS:
Hello Winter- HW95007 Arctic PlaidHW95014 Element StickerHW95015 Alpha StickerHW95017 Teal / GrayHW95018 Dark Teal / CreamHW95020 Decorative BradsHW95022 6x12 ChipboardHW95023 6x6 PaperPadHW95028 Enamel Dots
ECHO PARK PAPER
using a few SVG shapes from the Silhouette Design Store.
www.echoparkpaper.com
www.silhouettedesignstore.com
Teal/Grey paper and the Label Set SVG File set from Silhouette Design Store.
I cut the largest scallop design from the plaid paper to measure 11” in diameter.
The scallop paper was center and glued to the dark teal/cream paper. I used strips
of foam adhesive tape to attach the label paper to the center of the scallop.
The two were layered side-by-side and overlapped to measure 7.25” wide.
I used the cream side of the solid paper as a mat for the photos and then
attached it to the top/center of the label paper.
Pine Trees SVG File set, I cut out several of the tree shapes. I added the 6X6
squares to the 12” cutting mat and arranged the trio of tree shapes so that they
would be cut from each of the three squares. A sticker strip from the Alpha Sticker Sheet
was attached along the bottom of the photos. The trees were clustered in threes at
each side of the photo and overlapping the sticker strip as needed.
I used foam adhesive to achieve various dimensions for the trees.
Round chipboard snowflakes were used to embellish the tops of a few of the trees. Instead of journaling, I used one of the sticker sentiments. The alpha stickers were the perfect size to go atop the chipboard banners. Instead of spelling out ‘snowman’ I simply allowed the snowman sticker to complete the title!
PRODUCTS:
Hello Winter- HW95007 Arctic PlaidHW95014 Element StickerHW95015 Alpha StickerHW95017 Teal / GrayHW95018 Dark Teal / CreamHW95020 Decorative BradsHW95022 6x12 ChipboardHW95023 6x6 PaperPadHW95028 Enamel Dots
12x12 Layout
Bokeh
Echo Park Paper
Layout
Selfie Mini Theme


Bokeh-On-Bokeh Layout
The “Selfie” Mini Theme by
ECHO PARK PAPER
ECHO PARK PAPER
is on point for anything preteen or teen related…
even if it’s not pertaining to a selfie!
I have used the mini theme to showcase a photo strip taken of my
son and his date at their Junior Prom. The on trend colors and design of
“Selfie” captured the moment perfectly!
I started with a 12x12 base paper from “Side B” of the “Cameras” paper.
Next, I cut a black cardstock down to 8.5” square and machine stitched it to the
center of the base paper.
For the focal point paper (which was cut to 8” square) I wanted to expound
on the bokeh look of the “Words” paper (side B), so I used a ¾” and 1” circle die to
die-cut holes randomly throughout. Next, I used strips of thin foam adhesive tape to
attach the bokeh paper to the top center of the black cardstock. This gave just
the right amount of depth to the die-cut areas.
Medium sized enamel dots were placed inside of the larger, 1” circles.
These take on their own shine and lend to the bokeh feel of the layout!
I used one of the 4X4 journal cards found on the “Journaling Cards” paper and
embellished it with various stickers before adding the photo strip to the side.
Three blooms from the back of the “Journaling Cards” paper were trimmed out
and colored with Prisma Colored Pencils. For a smoother finish, I used Gamsol
(odorless mineral spirits) and a blending stump to create beautiful watercolor-like flowers.
Use this bokeh-on-bokeh trick on your cards or other crafting projects too!
Products:
Selfie Mini Theme- SW6201 Selfie Sticker
SW6202 Journaling Cards
SW6203 Cameras
SW6204 WordsBundle of Joy- BJBT78028 Enamel Dots
Selfie Mini Theme- SW6201 Selfie Sticker
SW6202 Journaling Cards
SW6203 Cameras
SW6204 WordsBundle of Joy- BJBT78028 Enamel Dots
See more product and ideas at www.echoparkpaper.com
12x12 Layout
bella rouge collection
pink paislee


Four or More: Best Buddy
Happy Sunday! I was recently up at
PINK PAISLEE
with a "Four or More" photo project that I was really excited to take on.
I'm generally a three-photo-or-less type of scrapper, but I found a
way to stick with three larger photos and then added a smaller photo as an embellishment!
I started out by cutting the Shine Patterned Paper (diagonal stripe) apart along
one of the lines and then layered it on top of the Beautiful Patterned Paper (yellow dot).
Then I had a thought to create a intersection by adding the reverse side of the cut
Shine paper...it was the perfect juncture for the beginning of the title.
The photos were printed at wallet size and then trimmed down to leave just a
small white border around each. I took the photo of Bear and used a 1.75" circle
die to cut out his face. A 2" scalloped punch was used to create a black
background for the photo; the two were layered together with foam adhesive.
By embellishing and adding a bow, it made an eye-catching focal point.
I accented the photos with various chipboard hearts and washi tape stickers.
I adhered the washi tape to cardstock and then trimmed out...this allowed me to
add them to the layout with foam adhesive.
I typed out the journaling and then trimmed into strips.
The Transparent Alphas were adhered with a micro adhesive dot, but you can
also run through through a Xyron Sticker Maker, machine stitch or attach them with brads!
Collection used: Bella Rouge
See more Bella Rouge projects on the Pink Paislee Blog!
Have a great week!
12x12 Layout
photo editing app
pink paislee
tutorial


What's App?
This past week I shared a "What's App?" segment at
These segments focus on a variety of different applications that are available
to make your life easier and more fun! Whether you are using your smart phone
or computer, many of the apps out there are of little cost or even better, they’re FREE!
For my layout project today I decided to focus on one of my very favorite
online places called PicMonkey. PicMonkey is an online photo editor that
offers all sorts of themes, overlays, primo effects, textures and more!
For a small monthly fee, you can upgrade to a Royale account where
you have total access to all of the features, fonts, etc.
I took these sweet photos of our coach’s little boy, Easton. I’m really liking the
look of several photos in a grid, but on the same photo sheet, so I went with
that idea in mind. To begin:
Once you are at the PicMonkey website, select “collage”.
This brings up a selection to the left: Ducks in a Row, Cards, Square Deals,
Biggie Smalls, etc. I almost always choose “Biggie Smalls” because it will
give you one larger grid and two or more smaller grids. “Square Deal” is
also a nice feature if you’re wanting equally-sized photos in a grid
When you click on the option that you’re wanting, you will see a drop-down menu
where you can select the design that you wish to use.
Next, begin uploading your photos by selecting the “mountain” icon at the top left.
You can also rotate the grid by using the arrows at the bottom of the photo template.
When you have your photos in place (by dragging and dropping each photo
to its placement) click on ‘save’ at the top.
After you have saved your collage you can move on to ‘edit’ the template with
texture, fonts, banners, overlays, etc.
When I was ready to print the photo, I selected the “shrink to fit” option instead of the
“crop to fit” option so that it kept my photo square. I printed the photo on a standard
4X6 paper and then trimmed down…it matches perfectly with the 4X4 journal card.
In keeping with the sun motif, I cut a semi-circle from the Daytona paper found in the
Solstice Collection and stitched it to the top half of the page. I added the gold
geo foam shaped stickers to the top to mimic the sun’s rays.
I love having these user-friendly photo-editing apps at the fingertips or at the keyboard!
You can give a entirely different look to a cluster of similar pictures by placing them
in a grid and take it one-step further with some of the cool effects and templates.
Give it a try!
Visit the Pink Paislee blog for more ideas using their products :)
See you soon!
12x12 Layout
bella blvd
Kiwi Lane
Tiny Tots Collection


Tiny Tots Explore
Happening all this week at
BELLA BLVD
This is a week featuring the newest collections from Bella Blvd
and the designers have been given the 'anything goes!' theme!
Since I mainly create cards for Bella, I decided to step out and create
a layout with the sweet "Tiny Tots" Collection.
I had snapped a few pictures of this adorable redhead at our
Family Fun Day and I knew they'd be perfect to pair up with Tiny Tots :)
For the layout I incorporated one of the Kiwi Lane Bracket templates and actually
used the negative cut and attached it to the top of the page. I cut the red star paper
the same height as the wallet-sized photos and then added it with foam adhesive.
And I LOVE the new Amorie Alphabets. They have such a cute personality
and are perfect for kids' pages!
Drop by and visit Bella Blvd all week long as new projects and ideas
will be springing up everywhere! Hope you have a ter-rific week!
12x12 Layout
instagram
pink paislee
printing photos
Solstice Collection

Insta-Memories
Hi everyone! I'm sharing today over at
PINK PAISLEE
with a layout featuring Instagram photos!
I don't take a lot of pictures with my camera, but
my kids do...I have an easy way to copy those photos
to my computer and print from home...come by and see :)
Let me know if you have another way to go about
printing your Instagram pictures :)
12x12 Layout
pink paislee
Solstice Collection
summer


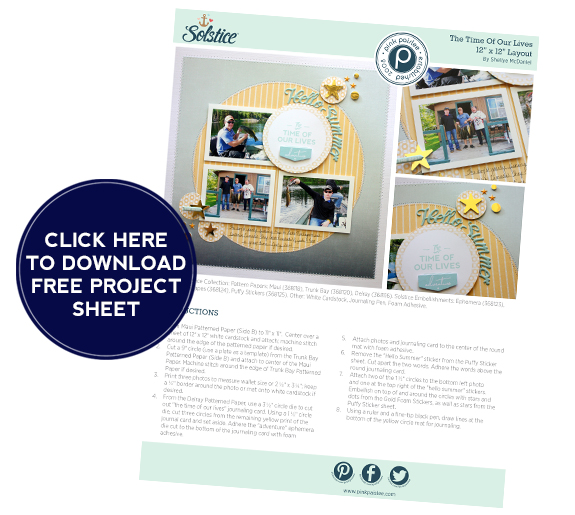
Solstice Summer: Time of Our Lives
My husband and boys recently returned from their annual fishing trip to Canada;
quite the jaunt for some guys from Texas, but they literally catch hundreds
of fish and look forward to the trip months in advance. I sent my old point & shoot
camera with them as was thrilled at some of the
scrapbook-page-worthy photos that they captured!
While thumbing through the 12 x 12 papers, the ombre side B of the
Maui Patterned Paper caught my eye and reminded me of water as it gets deeper.
I cut the paper down to 11 x 11 and centered it onto a sheet of white cardstock
before machine stitching around the edge. Next, I decided on the journal card,
“The time of our lives”, and used a 3.5″ circle die to cut it out.
I stayed with the circle theme and proceeded to cut a large, yellow mat from the
Trunk Bay Patterned Paper; I used a 9″ plate as the template. Next,
I used the remainder of the journal card pattern to cut out smaller 1.5″ circles.
For the title, I cut apart the “Hello Summer” Puffy Sticker and attached
it around the contour of the round journal card.
I placed the smaller circles in a fashion to resemble bubbles and accented
with several shapes from the Gold Foam Shapes. Finally, I used a ruler and
thin-tipped black pen to draw on lines for journaling at the bottom. I love the
versatility of the “Solstice” Collection and how you can fashion it around any
Summer activities whether it be a trip to the beach, camping or a fishing trip to Canada :)
To download the complete step by step instruction sheet, click the image below!
12x12 Layout
3 Birds Design
Blog Hop
HSN
xyron


A Happy 3 Birds Layout
Happy Tuesday!
I'm excited to be sharing in a little blog hop today with
XYRON & 3 BIRDS DESIGN
I have a layout using some 3 Birds' products:
patterned papers, 3-D stickers, glitter paper, stickers and plain tags.
The fabric flowers are from Maya Road.
From Xyron I have incorporated the Mega Runner for
all of the paper and photo attachment. For the flowers I used
several of the 3/8" Adhesive Dots for attachment.
Xyron and 3 Birds will both appear on
HSN's 24 Hour Craft Day tomorrow, July 23rd!
Thanks for stopping by!
12x12 Layout
Doodlebug Design
glitter chevron
Sugar Shoppe collection

Swims Like, Looks Like A Fish
It's all about Glittered Chevron Cardstock at
DOODLEBUG DESIGN
You will find cards, layouts, cutting file projects
and more on the blog until the end of this month!
I've created this fun layout of my daughter:
See close-up photos and learn how I put it all together on
last Thursday's blog post at Doodlebug!
Have a terrific week!
12x12 Layout
pink paislee
Solstice Collection


Spring Break Solstice
All month long we're featuring layouts with
PINK PAISLEE's
new "Solstice" Collection
See close-up photos and tips on how I put it together on the Pink Paislee Blog!
12x12 Layout
Authentique Paper
Life Cards
petaloo


Life Cards & A Squirrel
It's "Authentic Life Cards Inspiration Week" at
AUTHENTIQUE PAPER
Authentique has really hit a homerun with these beautiful
3X4 cards...perfect for pocket scrapbooking, mini albums,
cards, or as I have shared here: scrapbook pages!
This was a quick layout! I printed off my photos at wallet size and then cut them
so that they measured the same size as the Life Cards, which is 3X4.
I assembled all of the pieces into a grid design and then began embellishing.
**WIN SOME WIN SOME WIN SOME**
You could win your very own collection of the new Authentic Life Cards!
Just visit the blog all week and leave a unique comment each day :)
Good luck to you!
Good luck to you!
12x12 Layout
craftwell
Embossing
Pen Pals
pink paislee
xyron


Xyron + Craftwell Blog Hop
Welcome to Day #3 of the
XYRON & CRAFTWELL BLOG HOP
I was very anxious to try out the 8.5 X 11 Embossing Folders (Letter) by
Craftwell. With this size, you can create amazing flyers, invitations or give
texture to printables! For my project, I've chosen the Dotted Chevron (UNI)
PASSPORT PHOTOS...NOT MUG SHOTS
I cut a sheet of 12X12 cardstock down to 8.5 X 11 and embossed.
I centered the cardstock over a sheet of patterned paper (by Pink Paislee)
and machine stitched around the edges.
Four rectangular pieces of 6X6 paper were cut and adhesive applied with the 3" Sticker Maker.
I used the Photo Tape and applied a strip to the center (back) of each photo.
I like for the edges of my pictures to have a little 'lift' from the page, so just a
small amount of tape works fine for me!
And I LOVE the look of an old typewriter font for my journaling.
First, I typed out what I wanted to say and then printed onto a regular
sheet of copy paper. Next, I cut down one of the journal cards and made
sure that it was large enough to cover the journaling.
Using the Glue Stick, I dabbed a small amount onto the top corners of the journal
card and attached it over the printed area of the paper. I placed the paper back into
my printer and then reprinted the same journaling.
I wanted to leave as much of the embossed design showing as possible, so I
chose to cluster my photos and embellishments in one area.
High Tack Adhesive Dots are the perfect attachment solution for pieces such as
vellum, acetate or vinyl.
I had a lot of fun putting this layout together and implementing my brand new embossing tool!
Check out all of the fun designs at www.craftwellusa.com
And please visit the Xyron Blog and "like" them on Facebook.
Enjoy the hop!
12x12 Layout
Blog Hop
Double Page Layout
Miss Kate Cuttables
Out On A Limb
xyron


Out On A Limb + Xyron
Welcome to the final day of the
XYRON and OUT ON A LIMB SCRAPBOOKING
Co Blog Hop!
Xyron Blog and OOAL Blog
Both companies are offering some fun prizes, so stop by and leave a comment :)
I have two double-page layouts to share today using Xyron products and
pre-cut kits from Out On A Limb (sister company to Miss Kate Cuttables!)
My intention with both kits was to use all of the components with just a touch
of added embellishments...I think it shows just how far each kit will go.
For this layout, I used a border punch on the bottom of the green cardstock vs.
cutting the paper into a wave. Each kit comes with placement instructions, but I like
to move things around...either way, you will come out with a fun and original layout!
For all of the photos and mats, used the 1/4" Xyron High Tack Adhesive Tape.
I had the perfect camping pictures for this next kit, so I was quite excited!
For the title, I used the Xyron Creative Station since the pieces were larger.
For the other pieces, I initiated the Xyron 1.5" and 3" Sticker Makers...they're
the ideal adhesive for the intricate die cuts from Miss Kate's or OOAL!
That's all from me! You can see lots more inspiration by visiting the two
sponsoring blogs beginning May 12th through today.
Enjoy!


